Tools Needed
RJ-45 Modular Crimper Tool
UTP/STP Wire Strippers
Wire Map Tester
Snips
Mini Screwdriver

Step 1: Place your Cable in the Wire Strippers and Strip back 1 to 2 Inches by Twirling the Strippers.


Step 2: Separate the Pairs and Cut Out The String and Divider

Step 3: Start untwisting The Pairs and straightening them out with your Mini Screwdriver. I like to start from the middle with the Blue Pair and work my way out.

Color Code: We Recommend to use the T568-B Color Code as this is the Standard in the U.S for the most part.

Step 4: Again working from the middle out Untwist the Green Pair and Straighten them out.

Step 5: Do the same with The Orange and Brown Pair and Double Check your Color Code.


Step 6: Trim the Cable to length using your Crimp Tool or UTP Strippers. This will Cut them to the Exact Length needed. After you do a few of them you will know Exactly how long they need to be.

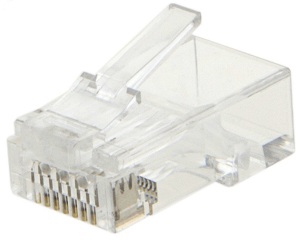
Step 7: Grab your RJ-45 with the Pins in front of you and Slide it on. This takes a little Practice and you may have to Re-Strip and do this a few times to get the hang of it. Also Dont forget to check your Color Code. Its easy for the Pairs to wiggle aroung at this point.

Step 8: I cant Stress this enough Check the Color Code again after you Slide the RJ-45 in. With the Connector on place it in your Crimper Tool and Crimp.


Step 9: Repeat the same steps at the other end of The Cable and use your little Wire Map Tester to make sure everything works.
Notes:
When you trim the Pairs before you Push in the Connector make sure the Outer Jacket also goes into the RJ-45 like this.

